Monday, 31 December 2018

2018 End Of Year Summary

Hello all!

So, here we are at the end of another year and time again for me to look back on my stitching and finishing over the last twelve months. It's the same boring format as previous years and mostly for my benefit, but for those of you who like lists, this is for you too!

I began the year planning to start and finish 12 pieces for the Smalls SAL, work on and finish 12 Challenge WIPs from 2015/2016 and possibly start (and finish) up to 6 new projects.

So, how did I do? Well, I finished 13/12 Smalls SAL pieces, finished 12/12 Challenge WIPs, and started and finished 4/6 of my planned new starts. I also treated myself to an unplanned new start on Christmas Day. So all in all, it was a very successful year!

Which means my statistics now appear like this:

Number of WIPs brought forward from 2017 - 14 large, 36 challenge = 50
Plus number of new starts -  1 large, 13 smalls SAL, 4 others = 18
Less number of finishes - 3 large (purged), 12 challenge, 13 smalls SAL, 4 others = 32
Number of WIPs to carry forward into 2019 - 12 large, 24 challenge = 36

Now comes the really boring bit (if you're not bored already!) .....

Here are the lists of projects which make up those statistics:

LARGE WIPs BROUGHT FORWARD
1)  Mythical Dragon (True Colors)
2)  Rainbow Angel (White willow Stitching) - PURGED
3)  QS Emerald Dragon (HAED)
4)  SK The History Of Chocolate (HAED)
5)  QS Come Softly (HAED)
6)  Mini Bookworm Fairy (HAED)
7)  Mini The Owrd Lord (HAED)
8)  QS Fairy With Butterfly Mask (HAED) - PURGED
9)  Mini One (HAED)
10)  Dolphin Ruins (Rabnann - ebay)
11)  OMG Tigger Is Out (UnconventionalX - etsy)
12)  Dragon Eye (not yet blogged)
13)  Scarlet Macaw Preening (Shinysun) - PURGED
14)  Magnolia (not yet blogged)

JANUARY/FEBRUARY CHALLENGE 2015 WIPs BROUGHT FORWARD
1)  Friends For Life
2)  Feline Groovy
3)  Loves Me ... Love Me Not
4)  Daisy Hugs
5)  Book Worm
6)  Carefree Summer
7)  A Tatty Friend
8)  Dandelion Time
9)  Flower Power
10)  All Aboard The Walnut Shells
11)  Christmas Wishes
12)  Daisy Umbrella
13)  Cuddly Feline Friends
14)  Choc-A-Holic
15)  I Love Butter
16)  Good Morning Nelson
17)  Winter Hugs
18)  Lickle Snooze
19)  A Windy Day
20)  Little Green
21)  Spring - FINISHED
22)  Start Trek TOS
23)  Summer - FINISHED
24)  Canal Crossing - FINISHED
25)  Hufflepuff Crest - FINISHED
26)  Clue
27)  Sugar - FINISHED
28)  Pretty Little Paris - FINISHED
29)  Evil Minions
30)  Spotted Owls - FINISHED
31)  Winter - FINISHED
32)  Tea - FINISHED
33)  Pandas

JANUARY CHALLENGE 2016 WIPs BROUGHT FORWARD
1)  Summer Alphabet - FINISHED
2)  Spring Alphabet - FINISHED
3)  Winter Alphabet - FINISHED

NEW STARTS 2018 - SMALLS SAL
1)  Raspberry - FINISHED
2)  Gouldian Finch - FINISHED
3)  Pear - FINISHED
4)  Cute Little Cockatiel - FINISHED
5)  Yellow Patchwork Hootie - FINISHED
6)  Dolphin With Cocktail - FINISHED
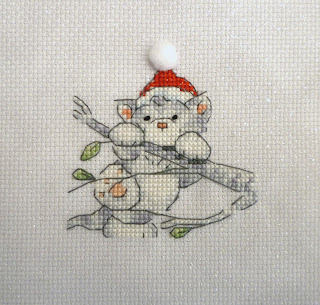
7)  Christmas Cat On Branch - FINISHED
8)  Tweeties - FINISHED
9)  Pineapple - FINISHED
10)  Purple Patchwork Hootie - FINISHED
11)  Banana - FINISHED
12)  Christmas Cat Hanging From Branch - FINISHED
13)  Mr Rush - FINISHED

NEW STARTS 2018 - LARGE
1) Tribal Dragon

NEW STARTS 2018 - OTHERS
1)  Haunted House Bell Pull - FINISHED
2)  French Country Snow Globe - FINISHED
3)  A Shower - FINISHED
4)  Midnight Manor - FINISHED

I may still have a lot of  projects left to finish but am very happy that it's 14 less than I started the year with.


As for my Box of Shame, I started the year with 52 pieces in it, added 29 more, fully finished off 63, so have therefore ended the year with 18 pieces remaining. I had a massive fit of fully-finishing-off at the beginning of the year and have mostly kept up-to-date since. Only a few (if you can call 18 a few!) pieces remain to completely empty the box.

So, here's another boring list of the the projects which were in, were added to and/or are still in my Box Of Shame (and again this is mainly for my benefit). Even if you don't read it all, look at all those FINISHEDs as you scroll down. Boy, am I proud!

BOX OF SHAME PIECES BROUGHT FORWARD
1)  January Stamp - FINISHED
2)  February Stamp - FINISHED
3)  March Stamp - FINISHED
4)  April Stamp - FINISHED
5)  May Stamp - FINISHED
6)  June Stamp - FINISHED
7)  Autumn - FINISHED
8)  July Stamp - FINISHED
9)  Cookie and Cream
10)  August Stamp - FINISHED
11)  September Stamp - FINISHED
12)  October Stamp - FINISHED
13)  November Stamp - FINISHED
14)  December Stamp - FINISHED
15)  French Country Witch
16)  Humerous Alphabet
17)  Summer Bird - FINISHED
18)  Ghost - FINISHED
19)  Halloween - FINISHED
20)  Halloween Cauldron - FINISHED
21)  Witches Hat - FINISHED
22)  Autumn Alphabet - FINISHED
23)  Penguin - FINISHED
24)  Snowman
25)  Woolly-Hatted Snowman - FINISHED
26)  Black-Hatted Snowman - FINISHED
27)  Santa - FINISHED
28)  January Calendar
29)  Polar Bear - FINISHED
30)  Bear - FINISHED
31)  February Calendar
32)  Spring Bird - FINISHED
33)  Coffee - FINISHED
34)  March Calendar
35)  Milk Train - FINISHED
36)  April Calendar
37)  May Calendar
38)  Dreaming of Dolphins - FINISHED
39)  Gryffindor - FINISHED
40)  June Calendar
41)  July Calendar
42)  Cream - FINISHED
43)  Birds With Umbrella - FINISHED
44)  August Calendar
45)  The Lock - FINISHED
46)  September Calendar
47)  Red Foxes - FINISHED
48)  October Calendar
49)  Pretty Little London - FINISHED
50)  November Calendar
51)  Slytherin - FINISHED
52)  December Calendar

BOX OF SHAME PIECES ADDED 2018
1)  Raspberry - FINISHED
2)  Winter - FINISHED
3)  Gouldian Finch - FINISHED
4)  Spring - FINISHED
5)  Pear - FINISHED
6)  Spring Alphabet - FINISHED
7)  Cute Little Cockatiel - FINISHED
8)  Canal Crossing - FINISHED
9)  Yellow Patchwork Hootie - FINISHED
10)  Spotted Owls
11)  Dolphin With Cocktail - FINISHED
12)  Sugar - FINISHED
13)  Christmas Cat On Branch - FINISHED
14)  Summer Alphabet - FINISHED
15)  Tweeties - FINISHED
16)  Summer - FINISHED
17)  Haunted House Bell Pull - FINISHED
18)  Pineapple - FINISHED
19)  Tea - FINISHED
20)  French Country Snow Globe - FINISHED
21)  Purple Patchwork Hootie - FINISHED
22)  Pretty Little Paris - FINISHED
23)  A Shower - FINISHED
24)  Banana - FINISHED
25)  Winter Alphabet - FINISHED
26)  Christmas Cat Hanging - FINISHED
27)  Hufflepuff - FINISHED
28)  Midnight Manor
29)  Mr Rush - FINISHED

So there we are... boring lists over!

During the year I stitched for a total of 479 hours, almost the same as last year but w-a-y down on the 809 and 691 hours from 2015 and 2016 respectively. But I'm not complaining, it's simply life coming first. Anyway, the fact I am able to stitch every day is satisfying in itself.

As for my stitching plans for 2019... all will be revealed tomorrow!

All the best and
Happy stitching :)
Rachel x

Saturday, 29 December 2018

New Start - Tribal Dragon - 10 hours

Hi all!

I knew I was getting this kit for Christmas and also knew I wanted to start it Christmas Day. But little did I think that I'd make such rapid progress that I could post my first 10 hour report before New Year!

This project is Tribal Dragon by Anne Stokes, charted by Thread Geeks. The kit was supplied with 18ct white aida and copious amounts of black thread so those were swapped out straight away for 16ct black aida. The black has taken a bit of getting used to but is not so bad now that I'm into the swing of it. I know I could have used a hand-dyed or paler fabric, but it just wouldn't have had the same visual impact as yellows on black.

Here's how the project will eventually look:


And my progress so far:

Tribal Dragon by Thread Geeks
Stitched on 16ct Black aida 2 over 1
Stitch count - 144 wide by 180 high
Started - 25th December 2018


I admit I've been stitching the easy bits first but now I'm into the interior and the dreaded confetti things will start slowing down (although with only 19 colours I know the confetti won't be too bad). I'll carry on with this project until the end of the year, after which it will join my other projects for stitching on in 2019.

Take care,
Rachel x

Friday, 28 December 2018

Smalls SAL - December 2018

Hi all!

It's the final Friday of 2018 so it's time for the final Smalls SAL posting of 2018. I hope your Christmas / holiday season is going well.


For December I couldn't not choose something Christmassy so stitched another little Christmas Cat. Back in July, when I stitched the first one, I asked you to vote for which of the five others I should stitch in December but there wasn't a clear winner, so I chose this one:

Dangling Christmas Cat by Design Works Crafts
Stitched on 16ct Tin over-dyed aida with sparkles from Sewitall.com 2 over 1
Stitch count 43 wide by 37 high
Started - 1st December 2018
Finished - 6th December 2018
Total stitching time - 7 hours 5 minutes


And need I even bother to say how he's been finished off?!


But there's also a bonus Smalls SAL piece this month since I had a couple of days spare and wanted to stitch something quick. So, appropriately for the busy build up to Christmas, here's Mr Rush, who's been finished off as a card to match the other Mr Men I stitched a couple of years ago.

Mr Rush available at my-cross-stitch-patterns.com (free)
Stitched on 16ct Lilac over-dyed aida from Sewitall.com 2 over 1
Stitch count 25 wide by 36 high
Started - 23rd December 2018
Finished - 24th December 2018
Total stitching time - 3 hours 5 minutes


So, that's it for the 2018 Smalls SAL. I stitched and fully-finished-off 13 pieces this year and look forward to being similarly successful in 2019!

Take care,
Rachel x

Tuesday, 25 December 2018

Merry Christmas!

Good morning all!

I wanted to take this opportunity to thank all of my blog readers for their wonderful support and encouraging comments throughout the year and wish you all a very Merry Christmas 2018, whether you are having a wintry Christmas in the Northern Hemisphere...

Related image

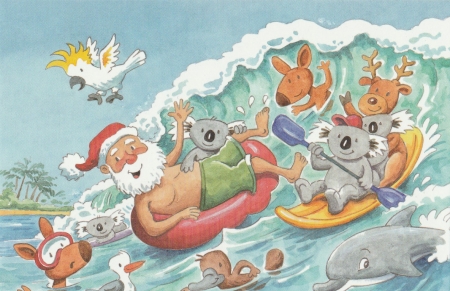
... or a summery one in the Southern Hemisphere:

Related image


I hope Santa has been good to all of you and you have a fabulous day doing whatever it is you do (ie playing with your new cross stitch stash!)

For those who do not celebrate Christmas, I hope enjoy the small end-of-year break.

Love
Rachel x

Sunday, 23 December 2018

Midnight Manor - finished!

Good afternoon everyone!

Yes, Midnight Manor is finished, complete with alterations and additions.

Here it was after 30 hours:


This is a reminder of what it should look like:


And here's my finished version:

Midnight Manor by Waxing Moon Designs
Stitched on 16ct Tangerine over-dyed aida by sewitall 2 over 1
Stitch count 133 wide by 121 high
Started - 27th October 2018
Finished - 22nd December 2018
Total stitching time - 34 hours 55 minutes


I don't want to blow my own trumpet (OK, maybe I do a little!) but I think my version looks so much better than the original... more atmospheric and definitely less bland.

I made quite a few minor changes so let me talk you through them:

- the fence on the left was moved one space to the right since it was asymmetrical with the fence on the right, and I couldn't cope with that imbalance!
- the path had to be adjusted very slightly because of the above
- the spider in the top right was replaced with a second hanging bat
- both bats were moved two squares towards the outside since I didn't like the fact that their wings touched the tree branch (as you can see with the bat on the right in the 30 hour picture).
- some little bats were added to fill in some of the blank spaces, especially behind the owl
- the pumpkins were stitched in 3853, as opposed to black (and changed from 741 which the I had originally used)
- lights were added into the house in DMC19
- 19 was also used to colour in the eyes of the animals and the missing feathers of the owl

Other than that, it's all as charted!!!

I intend to frame this piece some time next year, so until then it will go into my Box Of Shame.

Knowing that I'm going to have a new start on Christmas Day has left me two days to try to squeeze in a very small piece before then. I know exactly what that piece will be and you'll see it in the Smalls SAL post on the 28th.

Take care,
Rachel x

Friday, 21 December 2018

Midnight Manor - 30 hours

Hello all!

I thought maybe I'd get this finished within the next 10 hour stint but it was not to be. To be fair, I haven't got much left to do so my estimate wasn't too far out.

Here's how you last saw Midnight Manor:


And now after 30 hours:


I had planned to make the lights inside the manor a bright yellowy-green, but opted for a soft peach instead to go with the fabric. However, I do think the pumpkin is possibly too bright so may be frogged and replaced with a more browny-orange. Not sure.

So all I've got left to do is finish off the window lights, stitch (or restitch) the pumpkins and replace the spider which should be hanging from the branch in the top right with something else. I feel a Happy Dance coming on very very soon!

Take care,
Rachel x

Tuesday, 18 December 2018

Hufflepuff - finished; all 4 Harry Potter House Crests framed

Hello all!

So, this is finish number 35/59 from DSDUCJFC2015 and is the last of the Challenge pieces I planned to finish this year. It is, of course, the Hufflepuff house crest from Harry Potter.

At the end of November I left it like this, with only the bottom half of the shield to fill in:


And here it is all completed:

From theworldinstitches (etsy)
Stitched on 16ct Cream Aida 2 over 1
Stitch count 97 wide by 117 high
Started - 11th February 2015
Finished - 11th December 2018
Total stitching time - 47 hours 40 minutes


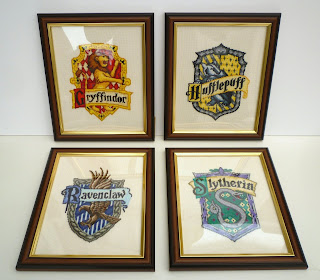
And with all the other crests:


When I finished Ravenclaw back in 2015 I framed it, thinking that I had three more matching frames for the other House Crests. But I didn't; I only had two, and that would never do! So I purchased four standard gold-edged 8"x10"dark wood frames and now have a set of four matching Harry Potter House Crests:


I have to say, I am very impressed with they all turned out. I'm one happy bunny (or should that be lion/badger/raven/snake?!) To me they are still the best charted versions I've seen, although sadly were removed from the store not long after I purchased them.

I've already picked out a wall space for them, so all I have to do is hang them and they'll be ready for everyone to admire (or ignore if the usual is true).

Now it's back to Midnight Manor. I'm close to the 30 hour mark so will be appearing with an update very soon.

Take care,
Rachel x


Thursday, 13 December 2018

Midnight Manor - 20 hours

Hello all!

Just a quick update today. I absolutely love this piece (especially the wrought iron railings!) and managed to fit in another ten hour stint on it at the end of November. Here is how I left it after ten hours of work:


And now after 20:


I am quite confident I can finish this within the next week or so, which will achieve my aim of finishing it before Christmas Day (got to keep the week between Christmas and New Year free for my new Tribal Dragon!) Fingers crossed...

Take care,
Rachel x

Saturday, 8 December 2018

Mini Pillow Tutorial

Hi all!

When I posted this finish, a few of you expressed an interest in a tutorial to show how I made the pillow, so here it is. It's long, but I also hope it's helpful and perhaps even a little inspiring.


A few pointers first though:

- I always iron light-weight interfacing onto the back of the project. This helps to protect the stitching from errant needles, stiffens the fabric and prevents the stuffing poking through the holes of the aida.

- it was all sewn by hand, really fiddly to start with and took more than one attempt. Time and patience are a necessity, especially when following someone else's instructions!

- the amount of fabric border showing will depend on the amount of spare aida around the design and how much aida you want to leave showing. In my example I had 2 inches of spare aida - I left 3/4 inch showing around the design, used 1/4 inch for the outside seam (a little more would be advisable) so was left with a fabric border of 1 inch.

- if you are attempting this, may I suggest doing so with scrap pieces of aida and/or fabric, or a less important piece of stitching first...  just in case!


I understand that it's not easy to write instructions nor follow someone else's so please feel free to ask questions or point out places where I've not been that clear and I'll try to answer and/or amend as necessary.


Here goes then:

1) Cut four pieces of fabric you wish to use as borders, allowing more than enough to cover the width of the edge of the aida. I used two different fabrics but the choice is obviously up to you.


2) Iron a small hem along one long edge each strip of fabric, ensuring it follows the warp or weft (I hate wonky fabric!) This crease will be used as a guideline to attach the fabric to the aida in a straight line. Alternatively you could draw on a feint pencil line. These pieces are just laid on at the moment.


3) Using the ironed crease/pencil mark as the guideline, pin the first strip of fabric to the aida, leaving some adia showing around the stitching. I left 3/4 inch between the design and the pinning; you might want more, you might want less (it took me three attempts before deciding 3/4 inch was the right amount for this design). Then using the holes in the aida attach the fabric with a running stitch. Leave a good tail of thread, do not fasten off the thread at the beginning or end and do not stitch right to the ends; you may need to adjust the end stitches later to account for the other pieces of fabric under- or over-lapping.


4) This is how the front should look when the now attached piece of fabric is folded back.


5) Attach the second piece of fabric using the same method. You will notice here that I have chosen to lay the right strip of fabric on top of the top strip of fabric, but in the photo underneath this one this has changed to the right strip being underneath the top strip. This is one of the reasons why the thread should be left loose instead of being fastened off; it was easy to unpick, adjust and restitch.


6) Repeat this process for the third and fourth pieces of fabric.


7) After all four pieces of fabric have been attached the back should look like this. You may notice that there are a few pencil marks on the back; this was my various attempts trying to work out the placements of the edges of the fabric strips. I did find it helpful marking the corners where the fabrics would meet though.


8) And this is what the front should look like. I deliberately wanted the corners to overlap like this, but attaching the two side pieces then the top and bottom pieces would look just as effective and definitely be less fiddly (as would using a sewing machine but I get real satisfaction out of hand-sewing all my finishes, and hand-sewn running stitch is a lot easier to unpick than sewing machine stitching!)


9) Then pin on the backing piece of fabric, again using the holes in the aida as a guideline. Remember to ensure the four strips of fabric are pulled back fully to ensure no puckering (I pinned them to the outside edge of the aida to ensure they stayed taught). Attach the back using the holes in the aida as a guideline for the running stitch and remembering to leave a gap to turn the piece in the right way! I left my gap in the bottom centre, but where you leave yours is up to you of course. Don't worry about the excess fabric, that gets cut off in a minute.


10) Having tied off and secured all the loose ends of threads, this is how the back should now look. The green piece of thread at the bottom represents the gap I left. In this space I continued the running stitch along the aida; those stitches will be picked up later to close up the opening.


11) Trim off all the excess fabric and cut the corners diagonally. I used pinking shears although usually leave more of a edge - it's just in this instance I din't have that much spare aida to play with!


12) Now turn the pillow in the right way, stuff and close up the opening using invisible stitching by catching the backing fabric and picking up the running stitch on the aida (forgot to take a photo of that bit but it's very clever). I personally don't like 'pokey' corners so try not to overstuff my ornies. This is probably a bit too much stuffing but, hey-ho, I can always sit on it for a while to flatten it out!!


13) Now attach the ribbon. I had three different attempts at attaching the ribbon but in the end found the following to be the easiest (but quite time-consuming way). Note - I gathered the ribbon a lot, but obviously it would be down to personal preference and/or the type of ribbon being used. For reference, this method used about 7x the amount of ribbon as the perimeter of the pillow.

Start at a corner, leaving a good few inches of spare ribbon and the tail of the thread loose so that the corner can be adjusted later if necessary. Gather the ribbon by sewing four running stitches through the bottom of the ribbon (just under the length of the needle) then pulling it tight... 


... and then attaching it to the pillow by catching one of the stitches used to sew the front and backs together. I picked up one of these stitches at about 1/3 inch intervals. 


NB When going around the corners I used five running stitches instead of four to account for the ribbon having to travel further and to therefore keep the gathering consistent-looking.


14) Where the ribbons finally meet at the corner, use the ends to make a small bow and secure the knot with a couple of tiny stitches.


Et voila... one finished completely OTT cutesy pillow!


I don't know how long it all took to put together, either with or without adjustments, as it was done in bits and pieces over the course of a couple of weeks. Assuming no errors, I would probably estimate a good 6-8 hours. When I make another one (which will hopefully be quicker than this first attempt) I will time myself and let you know!

Well, I hope I haven't confused you too much and have maybe inspired at least a couple of you to change some of your UFOs into FFOs, not necessarily by following these instructions, just by wanting to finish them anyhow!

Like I said, please ask any questions or suggest clarifications and I'll see what I can do.

Now... go dive into your pile of UFOs and FFO some of them before the end of 2018!!

Take care,
Rachel x

Thursday, 6 December 2018

November Progress on 2015/2016 Challenge Pieces

Hello there!

This will be the last time for a while that I post a report on the progress I've made on some of the projects I started for Debbie's Challenges back in 2015/2016. I was actually wondering whether to post this, seeing as there's only the one project to show, but why not?

During November I finished and framed Winter Alphabet (posted previously) and made progress on the one remaining piece I am hoping to finish this year:


Hufflepuff by theworldinstitches (etsy)
started 11th February 2015; last worked on last month
finished the name and the outside of the crest


As you can see, I've not got much left to stitch now. Once I've finished my piece for the Smalls SAL, which I'm currently working on, I shall get straight back to this one and return with a finish soon.

Take care,
Rachel x

Sunday, 2 December 2018

People's Choice SAL - Dragons

Hi all!

It's the first Saturday of the month (well, Sunday, sorry!) so it must be time for Jo from Serendipitous Stitching's People's Choice SAL. Many thanks to Jo for hosting this unique SAL which will have a different theme each month.


This month's theme is Dragons.

I'm really excited about this topic which means this is a quite self-indulgent and long (but could have been much much longer!) post. It also deviates away from cross-stitching a little at the end, so apologies in advance for the tangent. So grab yourself a cuppa (or something stronger) and enjoy!

I love Dragons, generally cute ones but then not all cute ones, and there are some non-cute ones I love too... it's obviously complicated as to which ones do or do not appeal to me.

I have a shelf full of little cuddly dragons, two walls adorned with dragon pictures, five different colour versions of the Lego dragon, and dragon skins for my laptop and phone but, surprisingly, I haven't stitched (or rather finished) many.

My only finishes are:

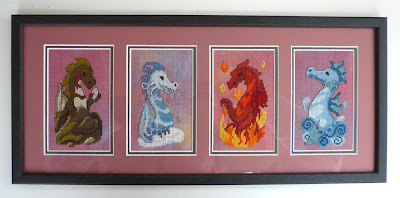
Elemental Dragons (Earth, Air, Fire and Water) by Dragon Dreams (freebies here)


My Treasure by Dragon Dreams (freebie at same link above)


But I do have a few dragon WIPs.

You may recall the barely-started Emerald Dragon by HAED I showed in last month's Birthstones post, so I'm not going to show it again.

But also in my unfinished pile are:

Mythical Dragon by True Colours
I started this way back in 1999 (it is my oldest WIP) and left it like this in 2000. It's on 18ct black, which was a really silly choice considering it's full of fractionals! I reckon I'm about half way through but am not sure if I will continue stitching it as it is, or restart it... on evenweave (probably the latter if the day ever arrives!)


The History Of Chocolate by HAED
Another HAED I've given up on because of the fiddliness. But it's not been purged so never say never. It would be a shame to see it go to waste.


Dragon Eye by EvasDesignsBg (etsy)
I made a very small start on this piece back in 2015 but only for four hours so it's never appeared on my blog. It will almost feel like a new start "when" I go back to it.


As for other future projects, there are quite a few dragons on my Large Stash page if you want to take a look, but I thought I'd show just the largest and the smallest:

Fire Dragon by Cross My Heart
This has been in my stash for almost 20 years so I'm wondering if it will ever get stitched! I don't mind the gizzilion shades of orange and yellow, or that it needs to be stitched on black, it's just that it's so big! Maybe I should just frame the A4 cover picture and be satisfied with that?!


Crazy For Dragons from Cross Stitch Crazy Magazine
But on a much smaller and more easily-achievable scale (pun intended!) a couple of these will be making an appearance next year for the Smalls SAL.


Being mythological and fantasy creatures, dragons can basically come in any shape, size, colour(s) and level of friendliness you require. Doing a quick google search for 'dragon cross stitch' (I really should not have looked!) shows just how many are available; there literally has to be something to suit everyone's taste...

...from the tiny and cute...

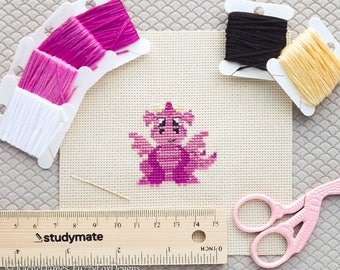
Cute Baby Dragon by FuzzyFoxDesigns (etsy)

...to the huge and scary...

Dragon Rip
Dragon Rip by HAED

...and not forgetting the famous:

Image result for dragon cross stitch
Toothless from How To Train Your Dragon by my-cross-stitch-patterns.com (free)

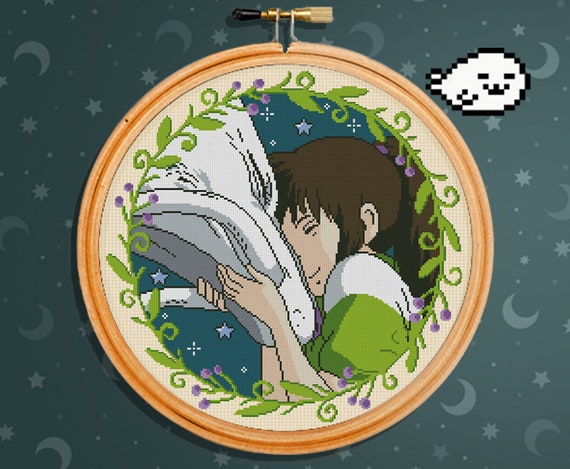
Haku from Spirited Away by HarpSealCrossStitch (etsy)

Image result for smaug dragon cross stitch
Smaug from The Hobbit from sunshineyday0630.ecrater.com


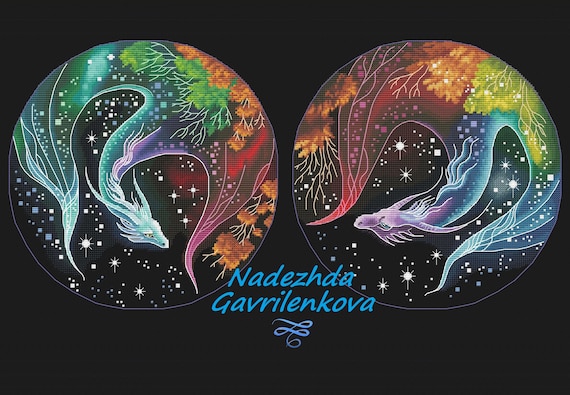
As a result of my search, the following two charts somehow (whistles innocently) found themselves being added to my etsy wishlist but ONLY my wishlist; I'm being a good girl... for now ;)

image 0:
Rainbow Dragon (him and her) by PatternNadGavr (etsy)

image 0
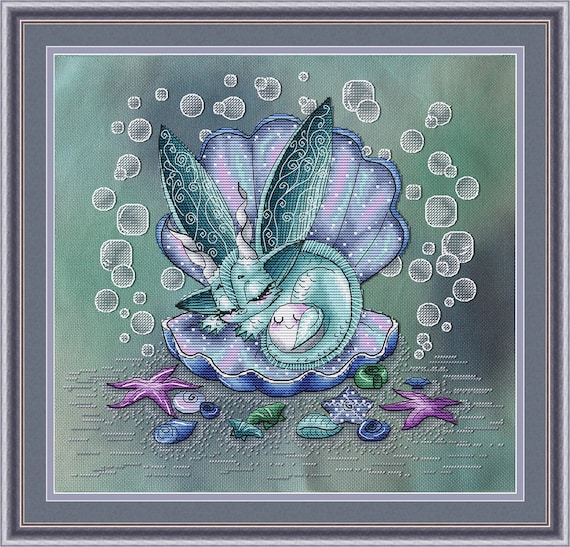
Dragon With Pearl from LoLaLottaShop (etsy)
There are quite a few in this series; click here if you would like to see the others. Go on, I dare you, you know you want to!
(Katie, there's a lovely sleeping dragon guarding a lighthouse...)


After my search, I convinced myself/my mum that I just HAD to have this one for Christmas, so it's been purchased and wrapped and is ready to go under the tree. I have a feeling I may *shock horror* deviate from my stitching plans and treat myself to a new start on Christmas Day. The kit is supplied with 18ct white aida but I'm not going to waste time stitching all that black when I can use black aida instead!

Anne Stokes' Tribal Dragon by Thread Geeks


Talking of Anne Stokes, I mentioned previously that I had lots of dragon pictures. Over the years, and after seeing some of the cross stitch versions on HAED, I have purchased various Anne Stokes 8"x10" canvas prints:

Some of Anne Stokes' Dragons


And, if you are familiar with other HAED dragons, you may have come across charts converted from pictures by Randal Spangler. Again, I didn't purchase the charts but instead purchased some of his limited edition prints and had them framed. I know it's cheating but, let's face it, I'm never going to stitch even one of his charts (I do have one in my stash) let alone these four beauties I've shown here:


Some of Randal Spangler's Dragons


Well, if you've made it this far, congratulations! Let's end with a wave from my pride of Lego dragons:

"Bye bye!"


Thanks for sticking with this post; I hope you enjoyed a trawl through my dragon psyche!

Next month - New Starts... and I promise a MUCH shorter post!

Take care,
Rachel x